IMPORTANT:
- You must first configure the Clarity Node-S device before connecting the Ozone Module. If you have not yet configured the Node-S, please find instructions here.
- The Ozone Module requires the Clarity Node-S operate on external power. Therefore, the solar panel may be removed if using the Clarity Node-S with the Ozone Module.
- Please review this entire deployment guide for more detailed instructions for your module as it has been modified to work specifically with the Clarity Node-S.
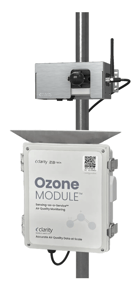
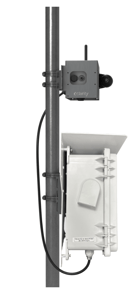
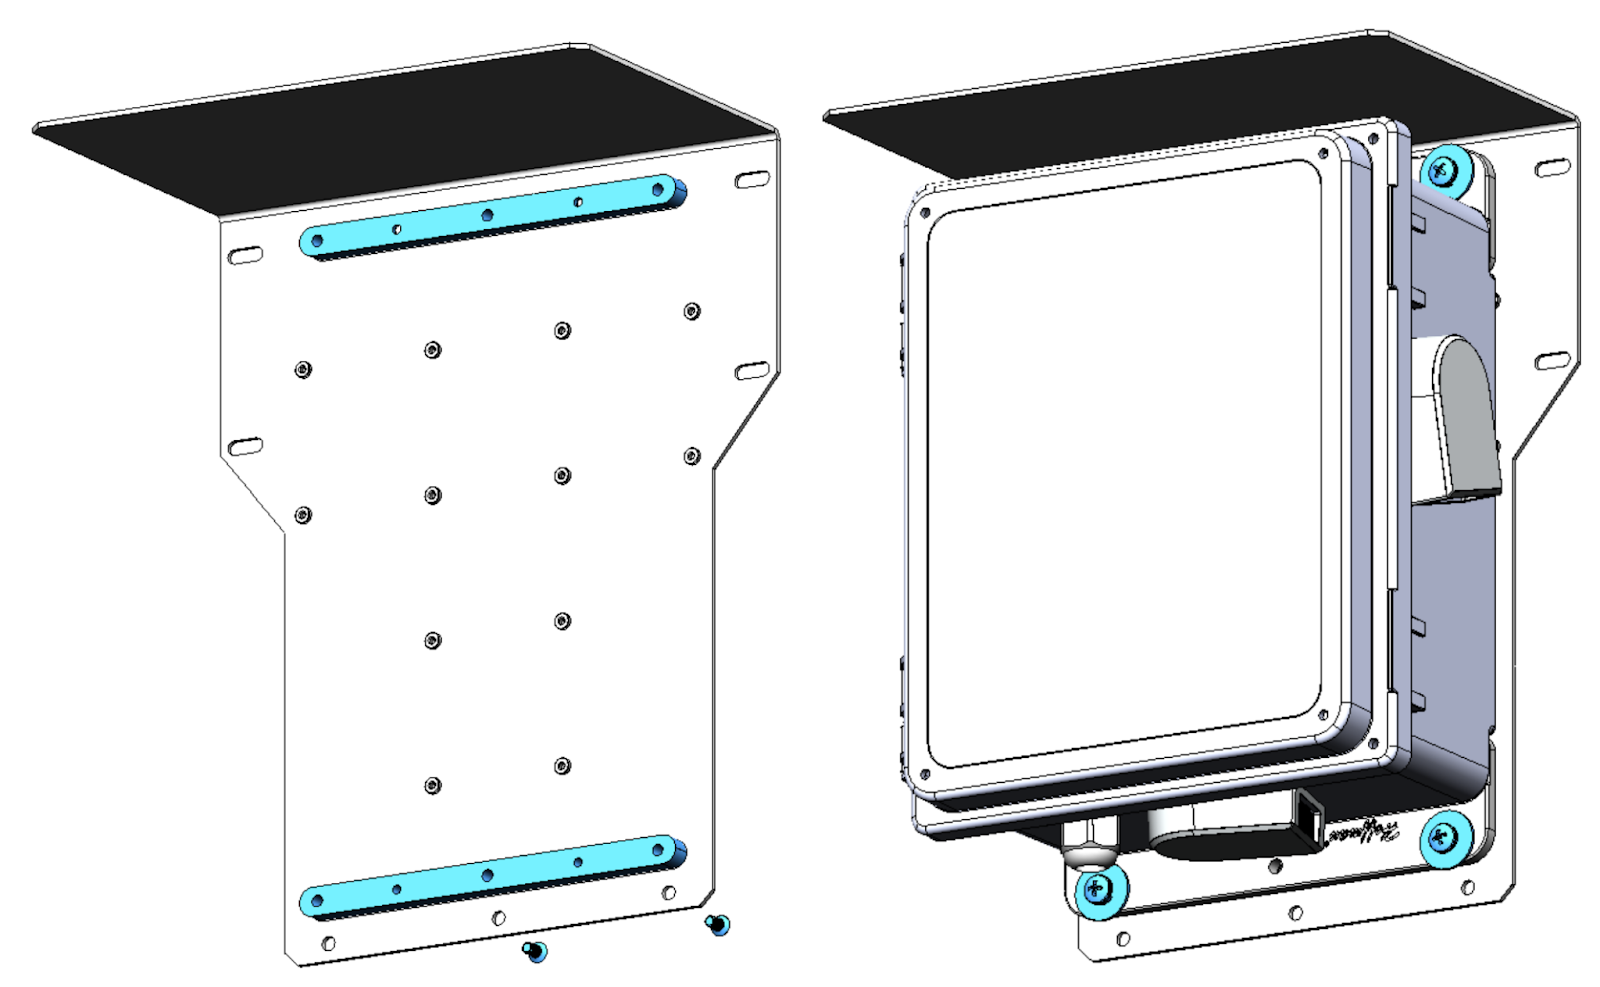
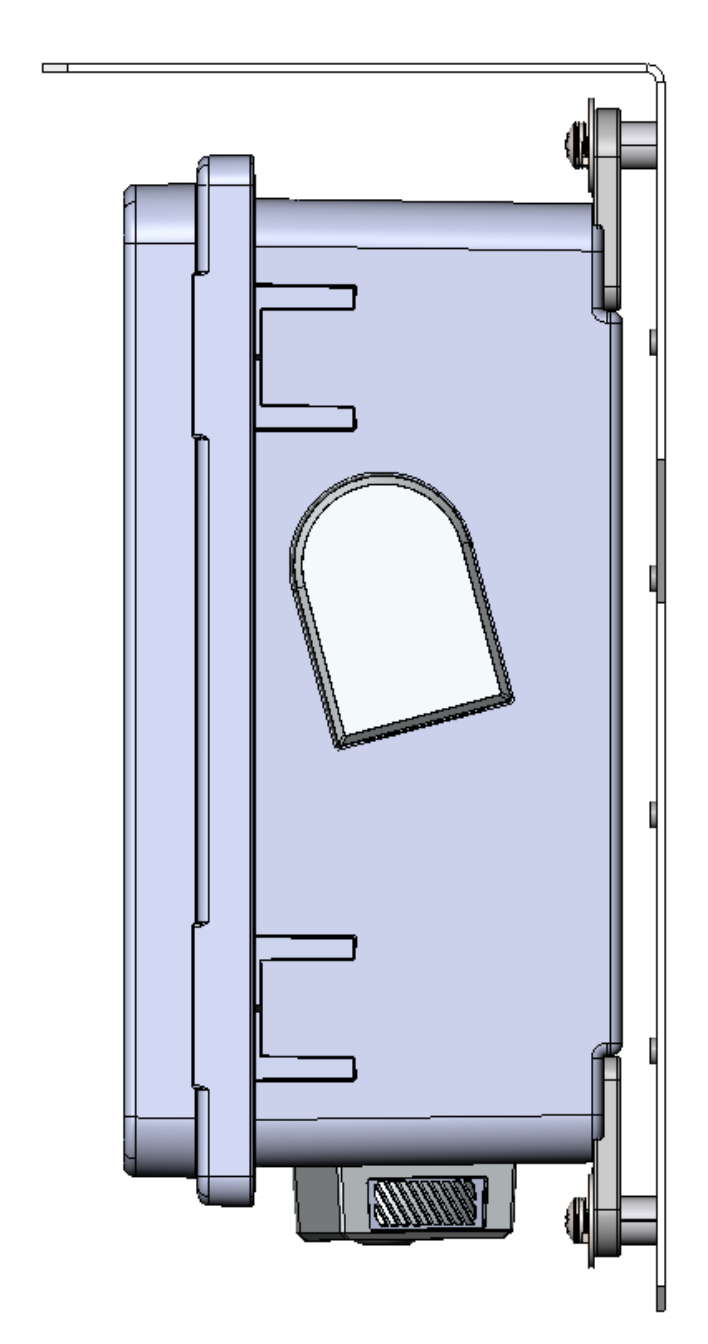
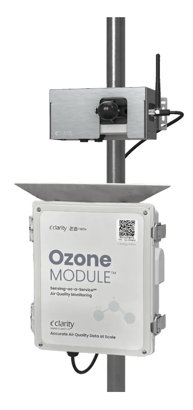
- Below is an example of what your Clarity Node-S and Ozone Module will look like after completing the following steps:
In the Box
|
1 (one) document package that includes the following:
|
|
|
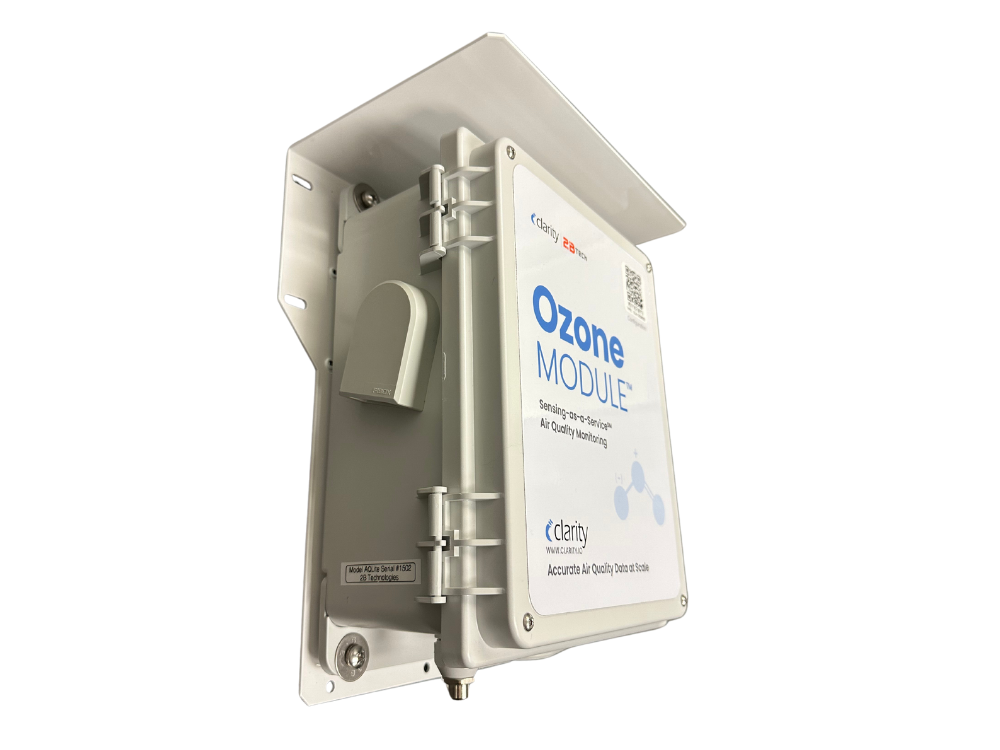
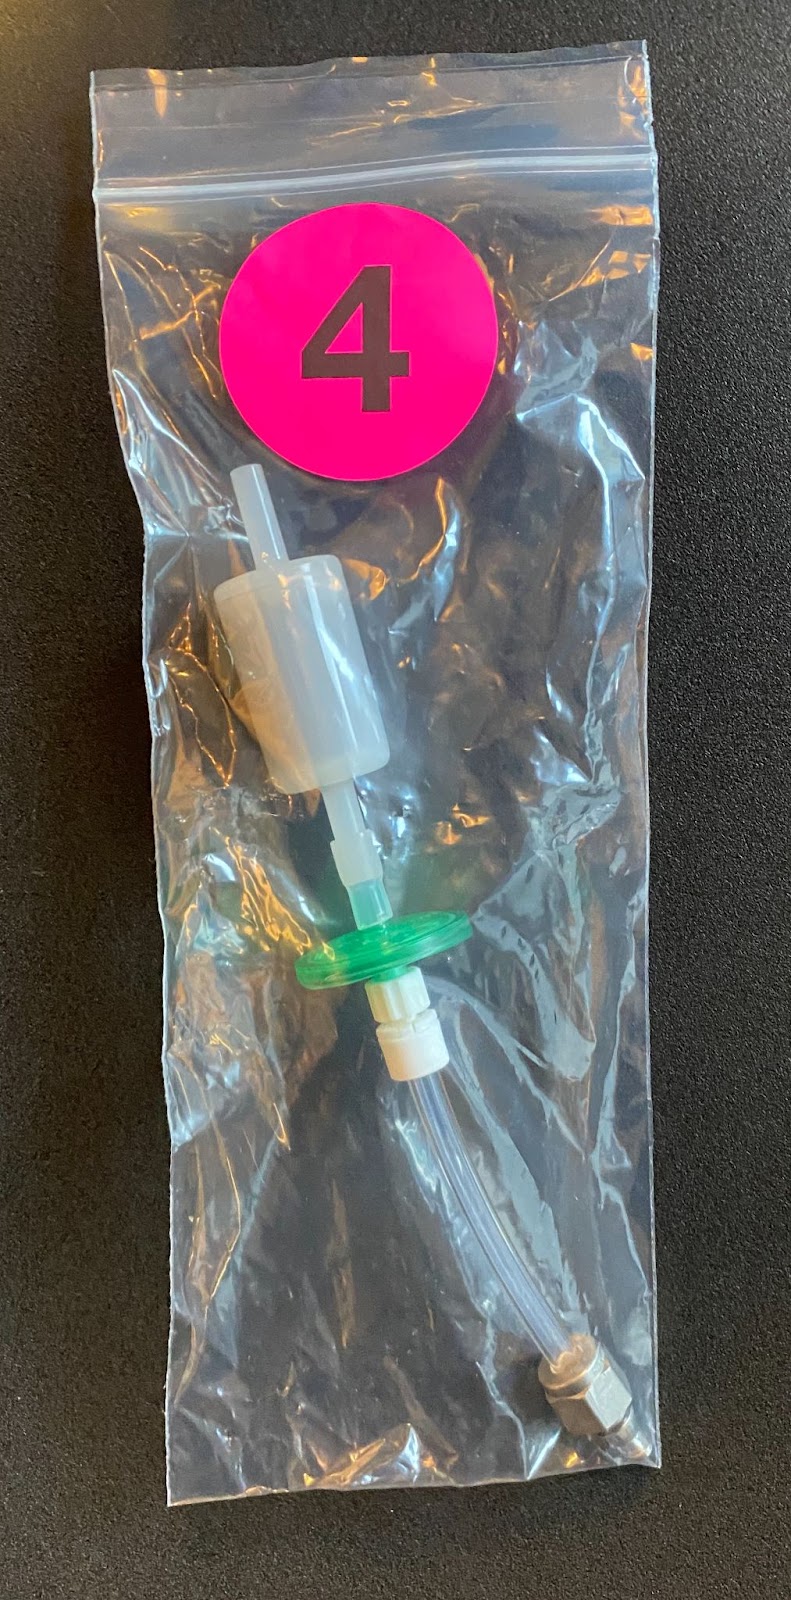
1 (one) ozone module with mounting hardware:
|
|
|
1 (one) zero scrubber |
|
|
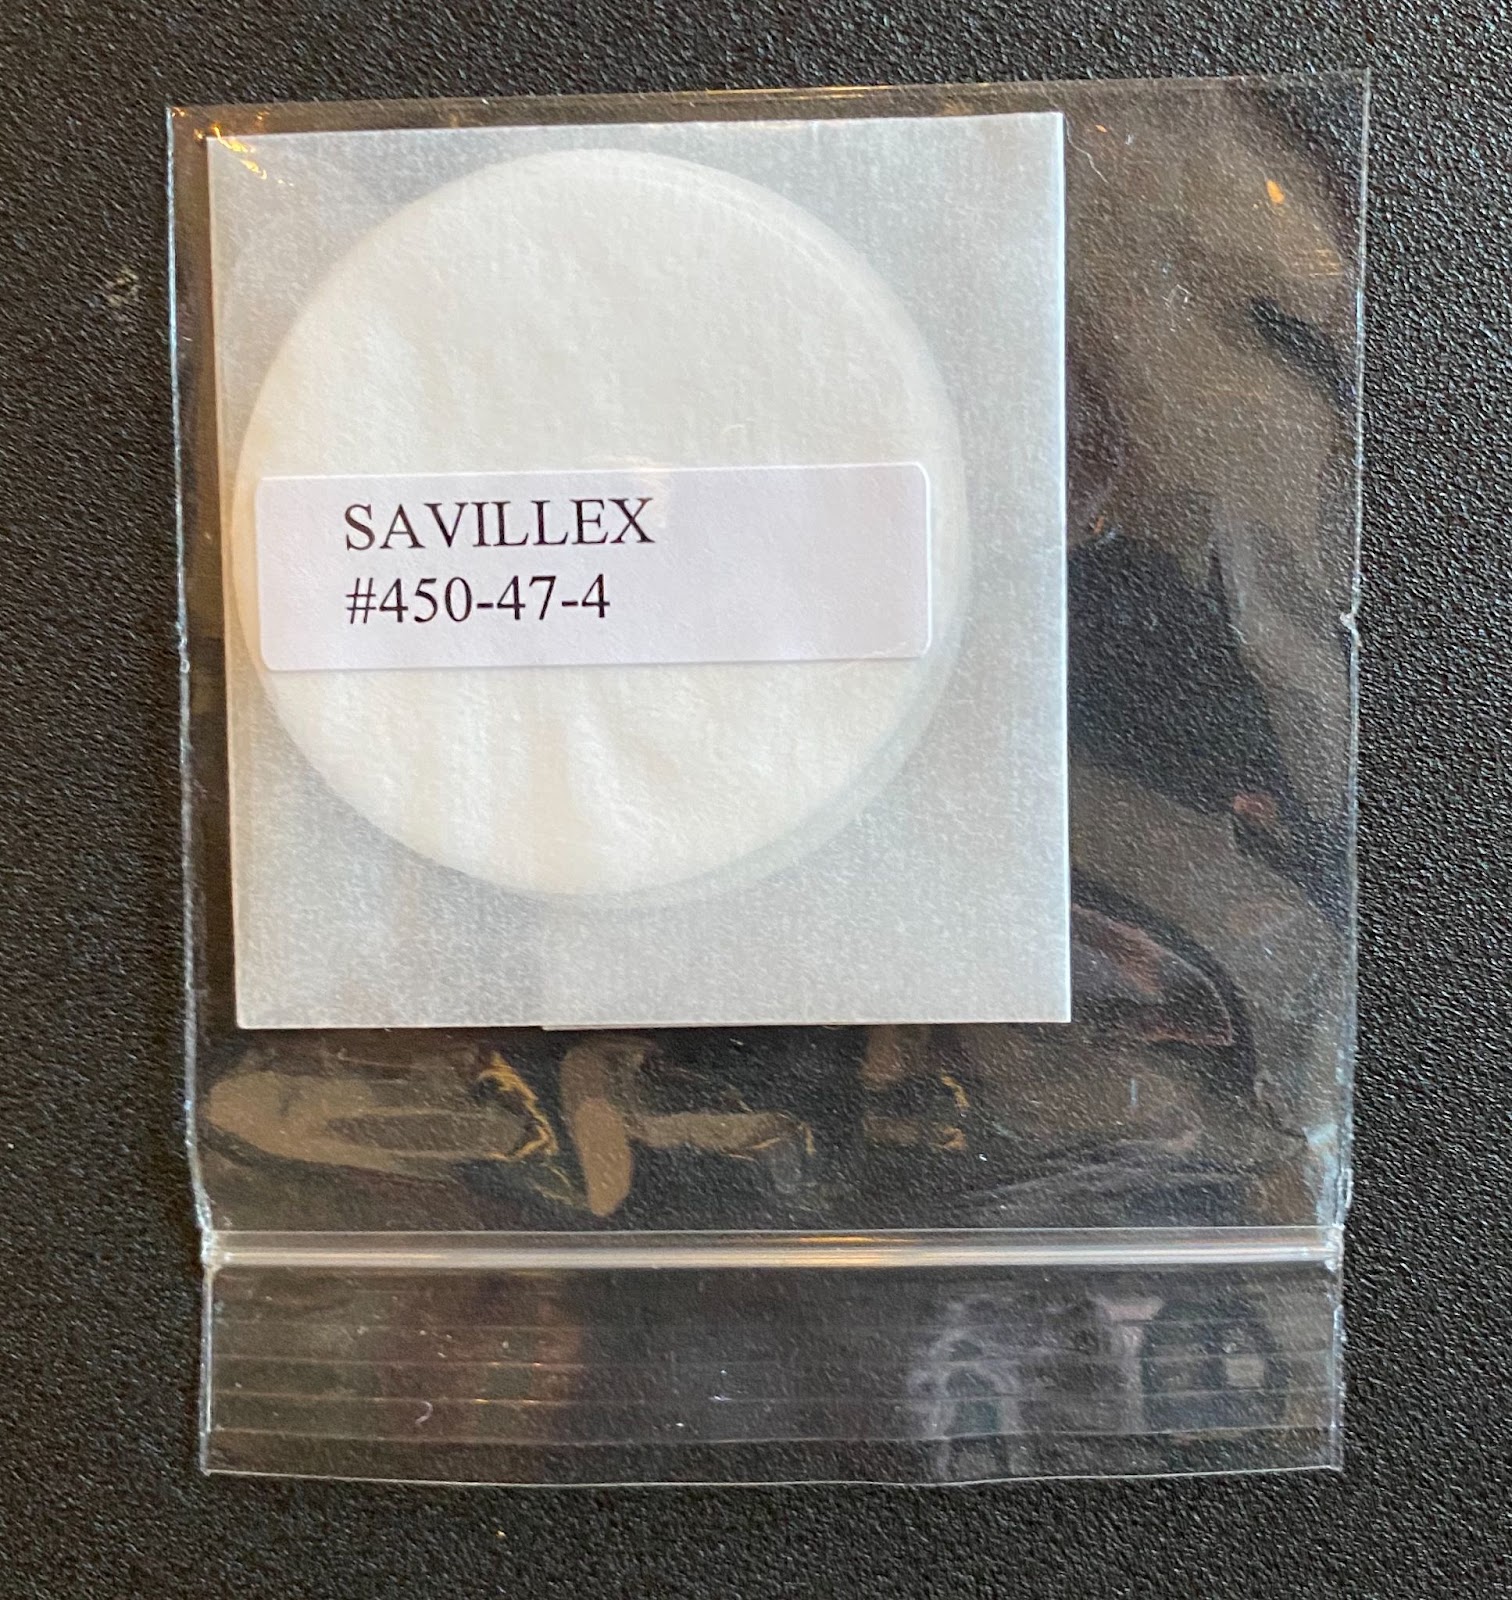
10 (ten) 47 mm TeflonTM filters (5-6 micron pore size) |
|
|
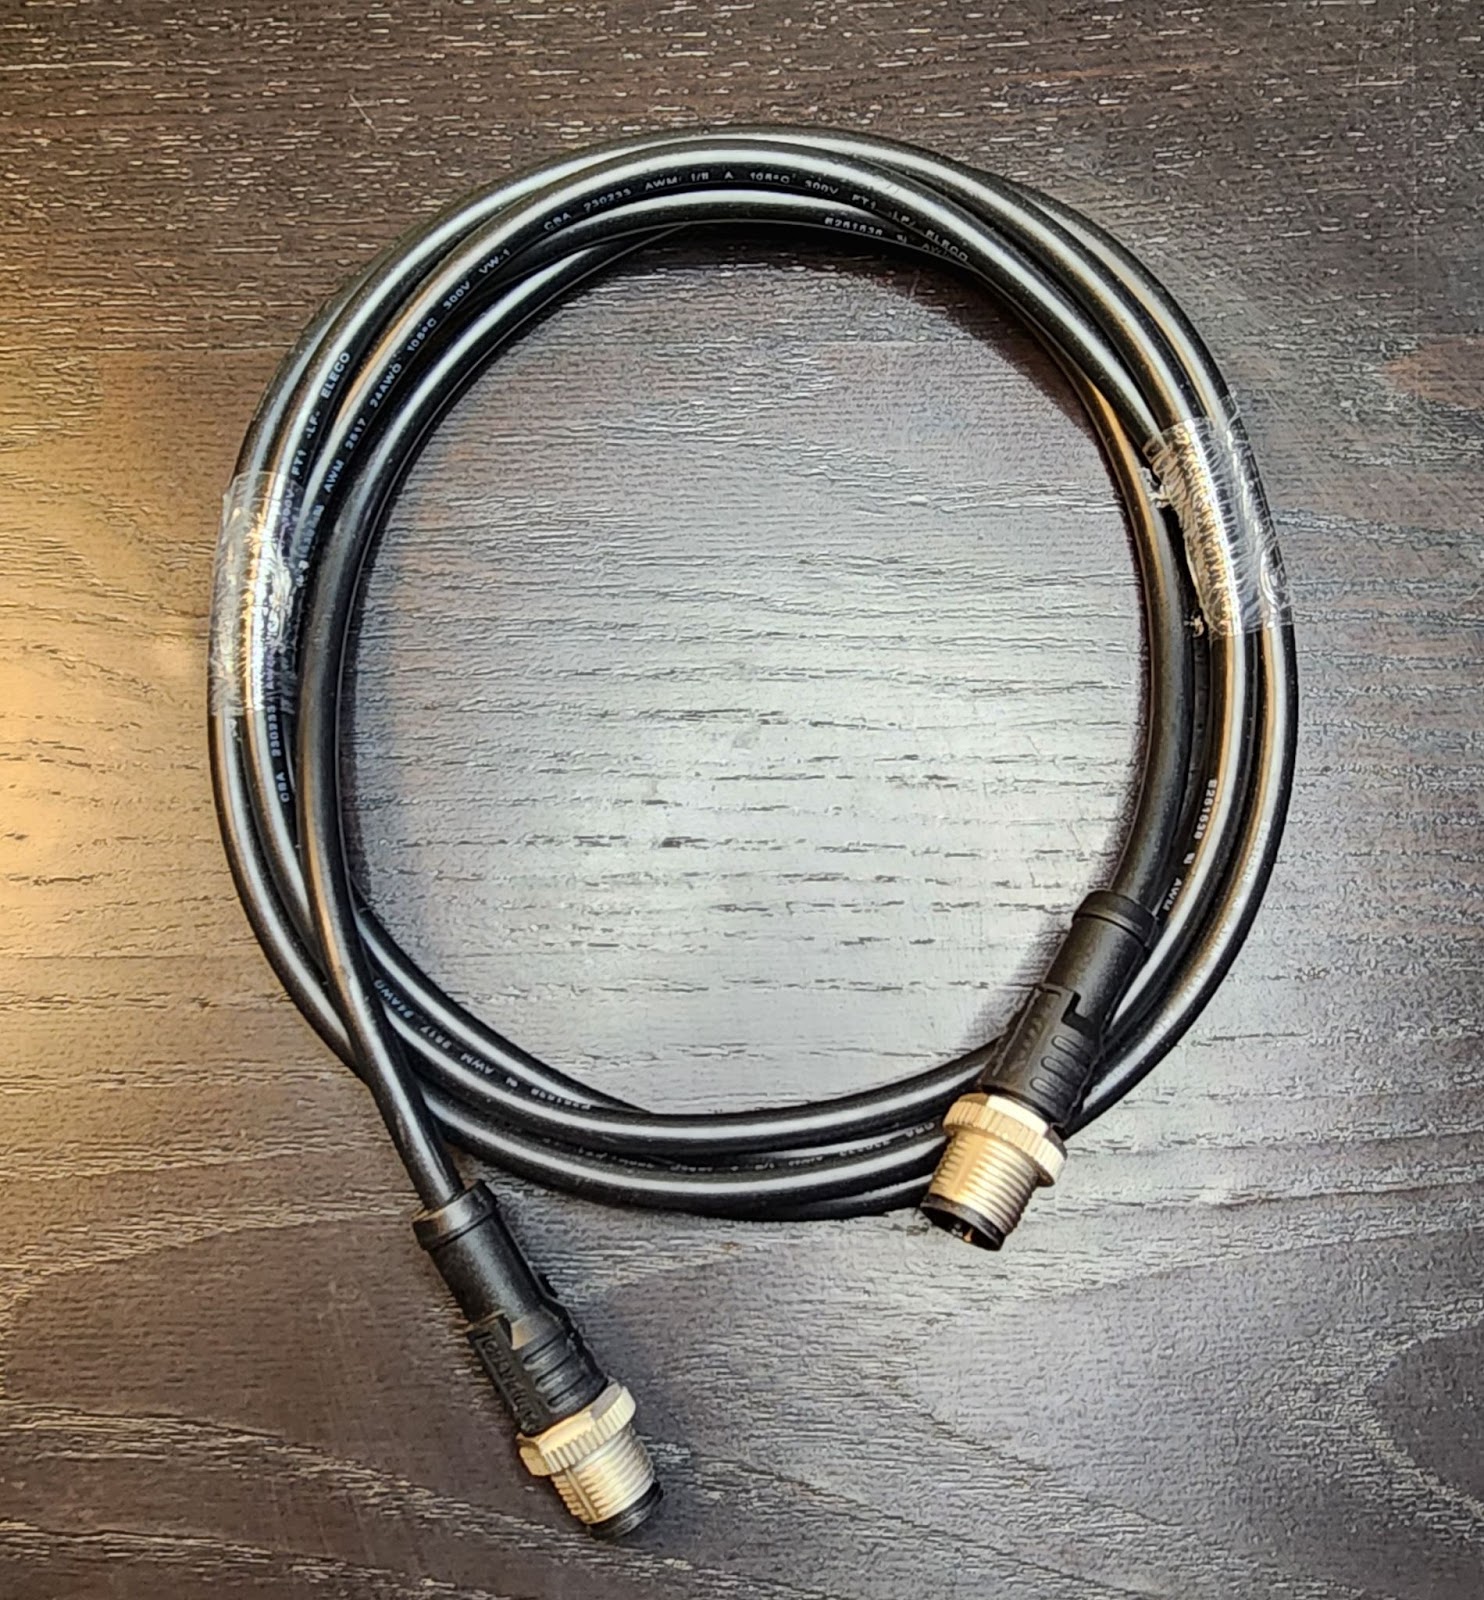
Cable, 8 conductor, M12, Male-Male 6’ |
 |
For ozone deployment, you will also need the following equipment (not included):
- A medium-sized Phillips head screwdriver
- Stainless steel zip ties, hose clamps, or screws for mounting that are appropriate for your site(s)
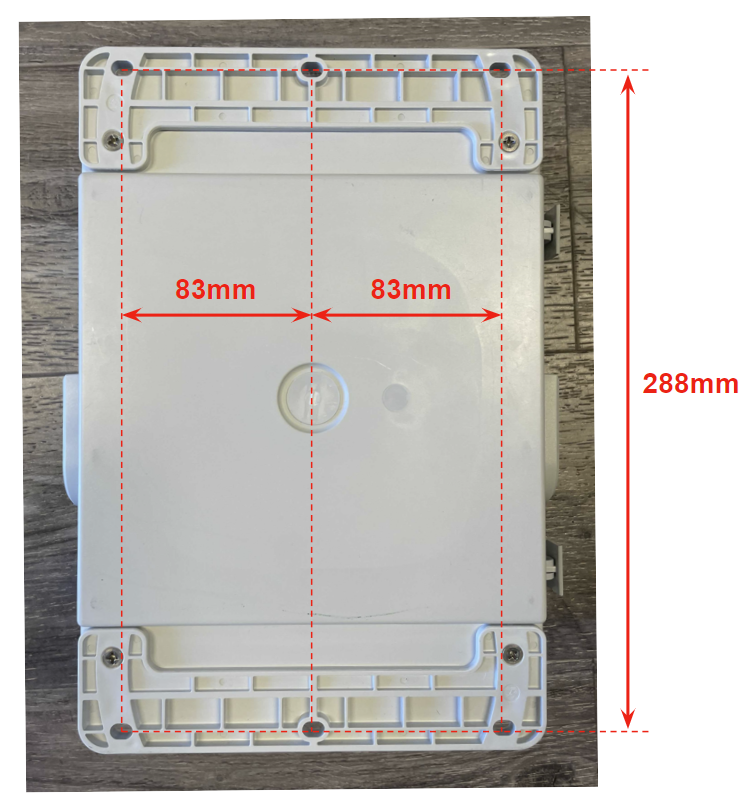
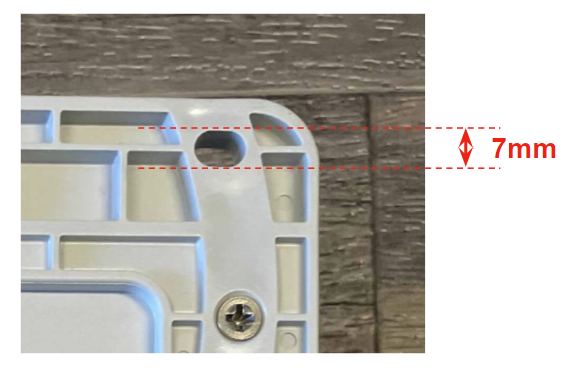
When preparing deployment hardware, please refer to the Ozone Module mounting interface dimensions found in the deployment section below.
Pair the Module to a compatible Node-S
To use an accessory Module, it needs to be “paired” with a Node-S device. The pairing process tells the Clarity system that the two are connected, correctly configures the node and allows the Module to begin sending data to the Clarity Cloud.
- Before beginning your Module pairing, make sure your Node-S is configured. To do that please review the instructions to configured your Clarity Node-S.
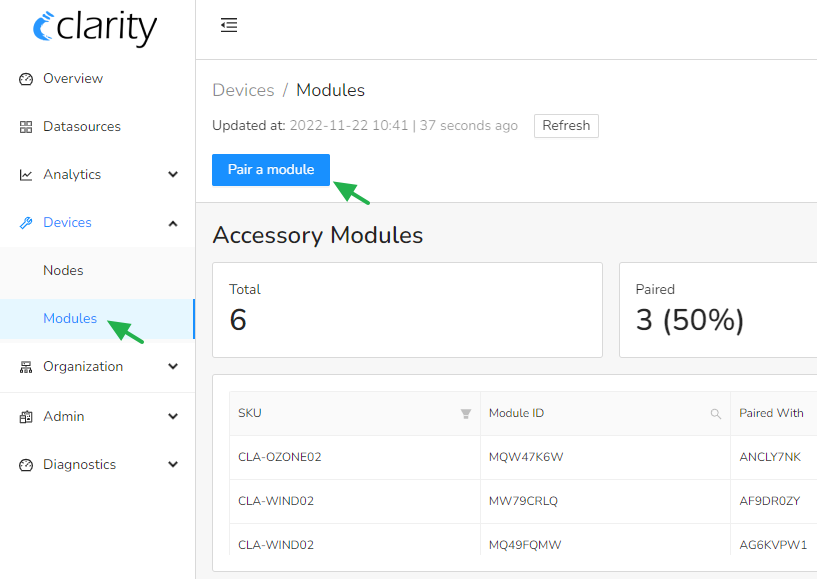
- Sign into the Clarity Dashboard and navigate to Devices > Modules.
- Click on “Pair a Module”. A configuration box will open.
4. Find the Module ID and input the Module ID, select the correct ID from the dropdown, or scan the Module QR code. Click “Next Step”


5. Confirm the information on the screen matches what is found on the Module ID sticker. Confirm both the Module ID and Model are correct.

6. Input the ID of the Node-S device that you want to pair the Module with, or select the ID from the drop down menu. The Node ID can be found on the bottom of the Node-S. Nodes that are not compatible with the Module are grayed out in the dropdown menu. Click “Pair”.

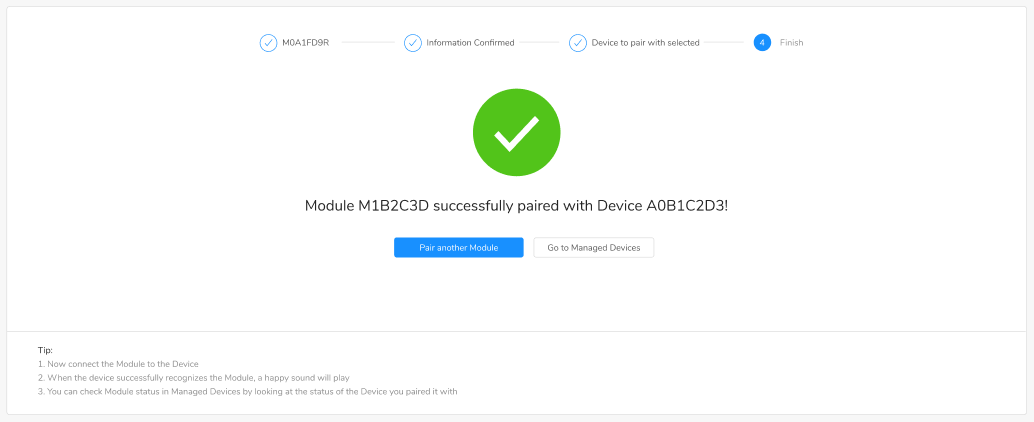
7. Successful pairing: You will see a message indicating that device pairing was successful. Continue to assemble and deploy the Module.
Unsuccessful pairing: If a Module has already been paired with another Node, you can 'unpair' before pairing with this Node.

Connect Module to the Clarity Node-S
Tip: We recommend performing a connection test before deployment in the field to ensure data are being uploaded to the Clarity Dashboard.
Note: The Ozone Module requires the Clarity Node-S be externally powered so the solar panel is not needed.
2. Power on the Clarity Node-S by first, plugging in the external power adapter to the Clarity Node-S body.
Then, plug in the power adapter to the external power source. The Node-S device will play the Power On sound (single beep).
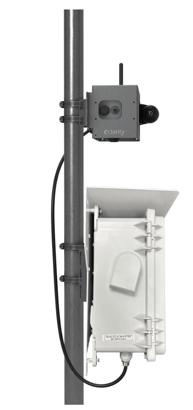
3. Connect the ozone module to the Clarity Node-S by plugging in the accessory cable to the Clarity accessory port as shown below. Twist the cable connector bushing clockwise into the threaded Node connector several turns until finger-tight, do not use a wrench. While you’re at it make sure the adjacent Node antenna connector is also finger-tight and the antenna is pointing vertically.


4. Once you plug in the Module cable to the Clarity Node-S, a Node-S Power On sound will occur and the device will restart connection to the Clarity Cloud. You will hear the Ozone Module pump turn on and start running.

5. Please wait as the Clarity Node-S first establishes cellular connection at your site. This may take anywhere from 2-10 minutes depending on cellular signal strength.
a. If the Node-S Connection Failure sound plays, please confirm the device has been configured on the Dashboard first.

b. If no sound plays, the node is not able to connect to the cellular network. Make sure you are in an area with cellular connectivity coverage.
c. If the Node-S Connection Successful sound plays, proceed to deploy the device.

6. After successful connection of the Clarity Node-S, the device will begin connection with the Module.
a. A successful Module connection will play a Successful Module Connection sound.
b. A failed Module connection will play a Failed Module Connection sound. If failed, please check the cable connection between the Clarity Node-S and the Module.
c. If you hear the Module Configuration Error sound, the Clarity Node-S is not configured to accept Modules. Please ensure you completed the pairing procedure described above.
7. After the Module is successfully connected, check that data from the Node-S and the Ozone Module are uploading using instructions: Confirm device data are uploading after deployment
Note: During the first 20 minutes of starting the Ozone Module, the Module is warming up. Please disregard data from this time period.
Deploy the Node-S + Ozone Module in the Field
Tip: Please review the Ozone Module Siting tips.
- To make installation easier, you can temporarily detach the ozone module cable from the node module port
- Use stainless steel zip ties, hose clamps, or screws (not provided).
- Ensure the inlet and outlet are facing downwards and unobstructed
- Ensure that the cable will be able to reach the Ozone Module once it is installed.


3. Reattach the Ozone Module cable to the Clarity Node-S body after both devices are securely installed.
4. Listen for the following sounds in succession after reattaching the Ozone Module cable to the Clarity Node-S body:
 .
. 
After deployment, if you'd like to learn on the maintenance requirements for your Ozone module, please review Maintaining and recalibrating your Clarity Ozone Module.