IMPORTANT:
- Node-S devices must be charged for a full 24 hours prior to deployment. Devices are shipped partially charged for safety reasons. Devices that are not charged before configuration may not complete configuration when deployed and only will configure once there is sufficient battery charge. The device will slowly charge up via solar but the time required to do so is variable by device, so we highly recommend charging the device fully before deployment. Without a full charge, follow up visits to the deployment site may be required.
- The Node-S devices must be oriented correctly to be weatherproof. The air inlet/outlet should point straight down to the ground. Incorrect deployment may allow moisture to enter the device and void the warranty.
Reminders:
- Your Clarity device comes with a SIM card pre-installed.
- Your Clarity device comes with a power adapter with plugs for US, EU, UK, and Australia sockets. Other sockets will require additional adapters that will need to be sourced separately.
- Please use this guide to set up your Clarity Node-S first before setting up any add-on modules. If you have already set up your Node-S device, please proceed to the deployment instructions for the module.
- If you have any questions about deployment, please contact support@clarity.io.
In the Box
|
1 (one) Solar Panel |
|
| 1 (one) Clarity Node-S body with 1 solar shield attached |
|
1 (one) power adapter with adapters for US, EU, UK, and Australia sockets |
|
|
1 (one) antenna |
|
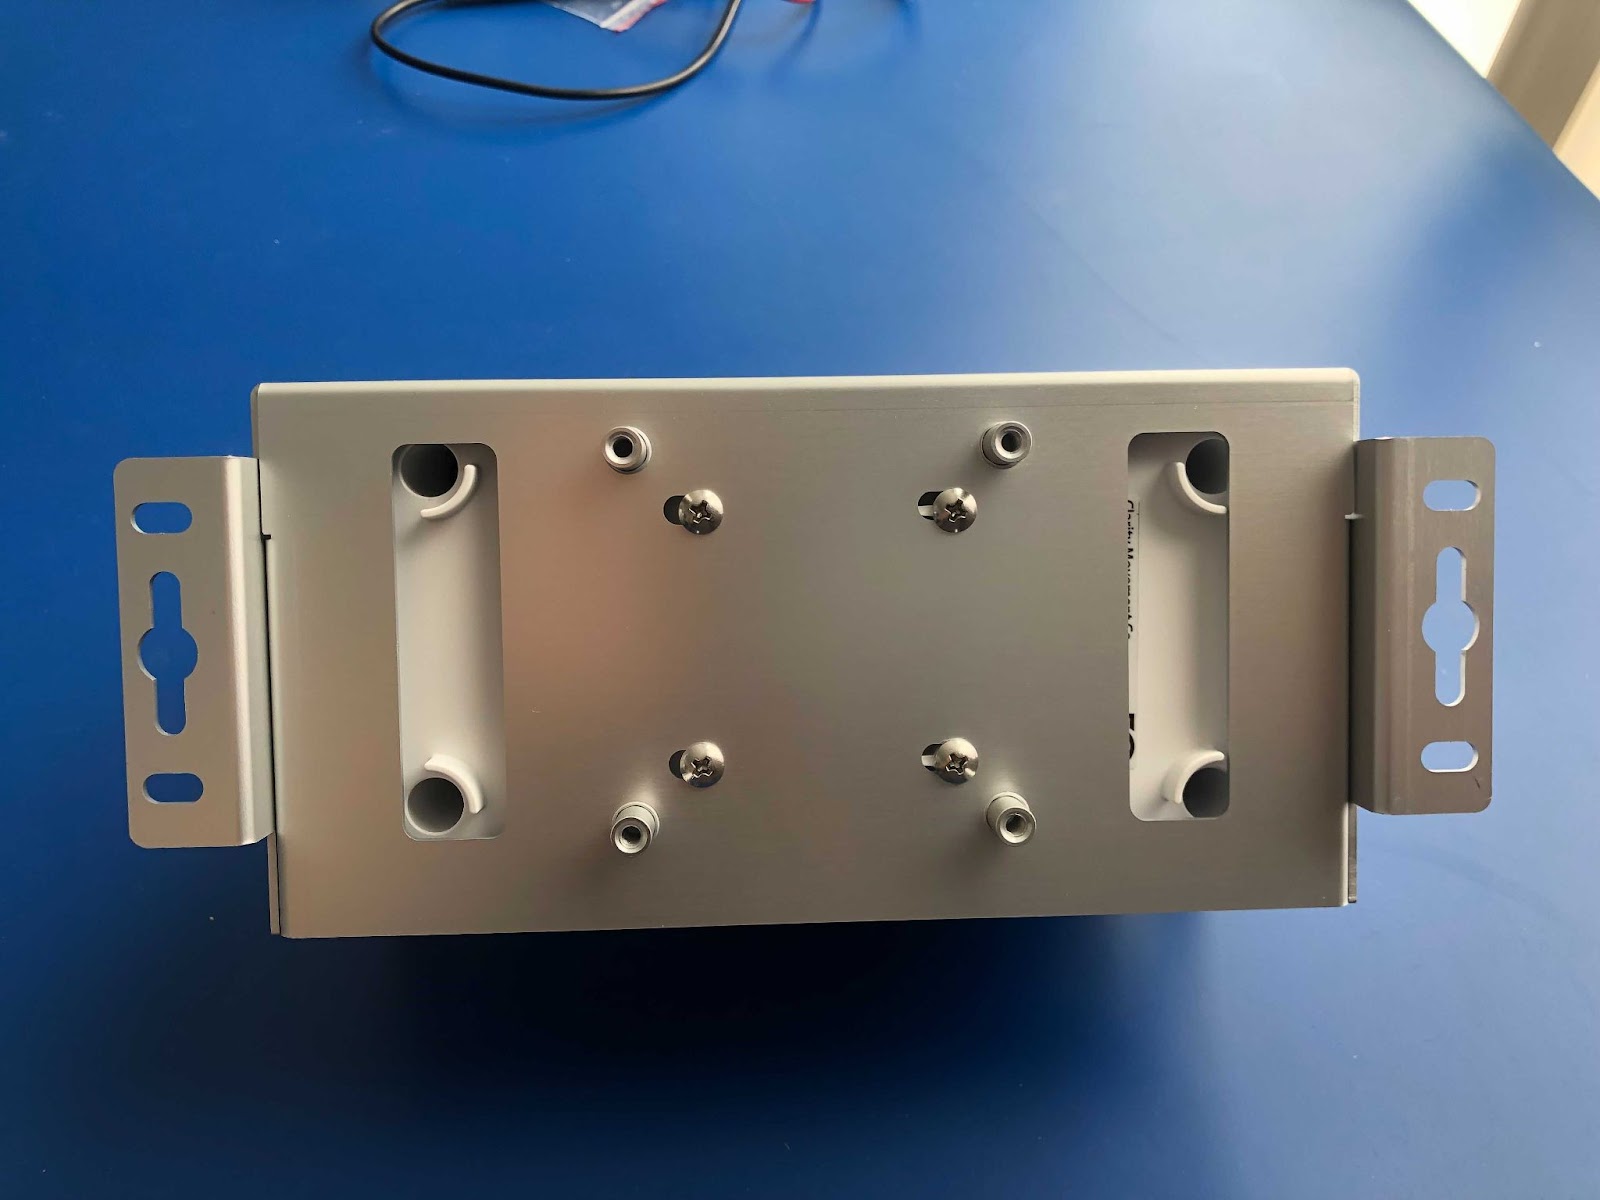
| 1 (one) mounting bracket |
|
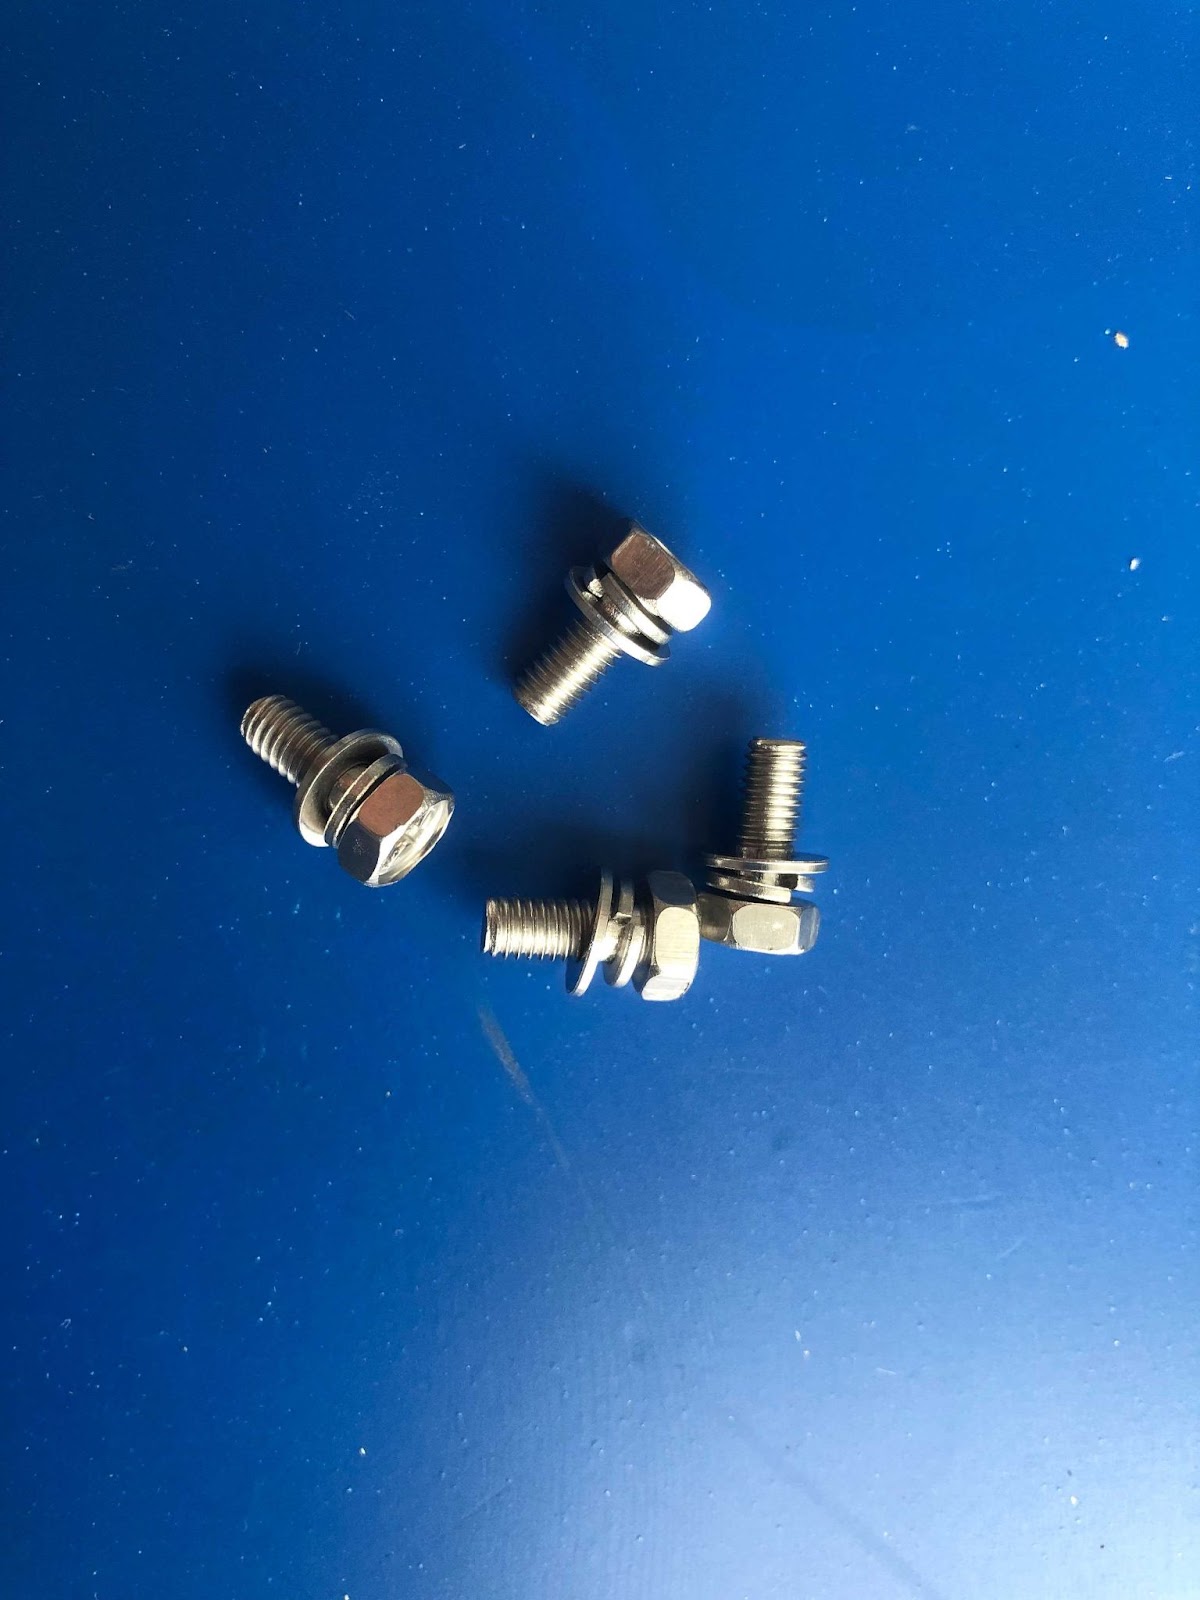
| 4 (four) screws with washers for mounting bracket |
|
.jpg?width=283&height=212&name=Image%20from%20iOS%20(9).jpg)
-1.jpg?width=284&height=213&name=Image%20from%20iOS%20(11)-1.jpg)
-2.jpg?width=283&height=213&name=Image%20from%20iOS%20(10)-2.jpg)
.jpg?width=289&height=217&name=Image%20from%20iOS%20(19).jpg)

For deployment, you will also need the following equipment (not included):
- A Phillips head screwdriver
- Stainless steel zip ties, hose clamps, binding straps, or screws for mounting that are appropriate for your site(s)
Assemble the device
-
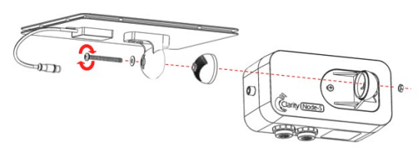
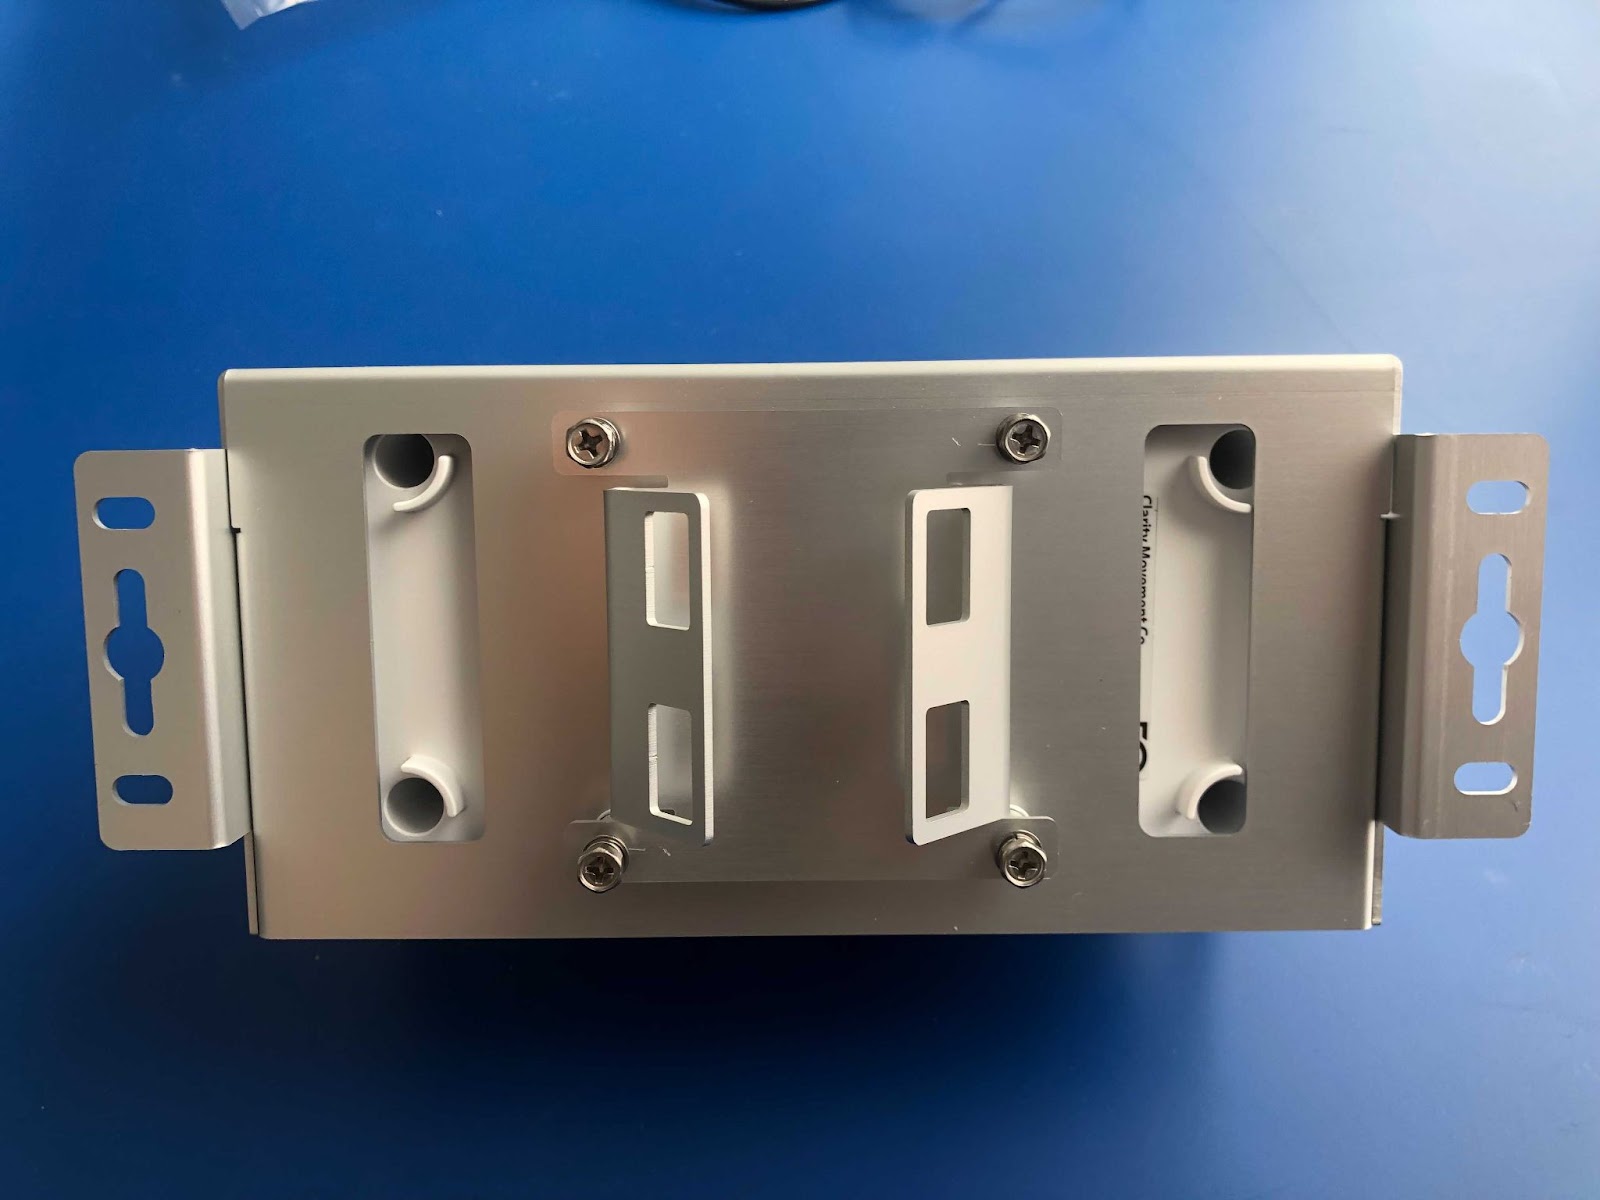
Attach the mounting bracket to the Node-S body.
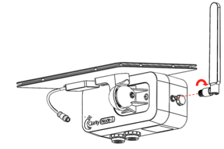
- If you have a generation 2 Node-S device with the aluminum solar shield: Your device includes an additional mounting bracket and four (4) screws that allows for using hose clamps to secure to railings or poles:
The optional bracket can be rotated and secured to the Node body using the screws depending on the direction of the railing or pole. Examples:
If you are mounting the Node-S to a wall or panel, do not use the additional mounting bracket. Instead, rely on the flaps on the sides of the shield. - If you have a generation 1 Node-S device without the aluminum solar shield: Attach the mounting bracket to the device body with the mounting screws. The bracket can be screwed in vertically or horizontally depending on the infrastructure at the site.

- If you have a generation 2 Node-S device with the aluminum solar shield: Your device includes an additional mounting bracket and four (4) screws that allows for using hose clamps to secure to railings or poles:
- Attach the solar panel to the device. Do not plug in the solar panel cable to the device body.
- Attach the antenna to the device body and orient upright.


Charge the device
IMPORTANT:
Node-S devices must be charged for a full 24 hours prior to deployment. Devices that are not charged before configuration may not complete configuration when deployed.
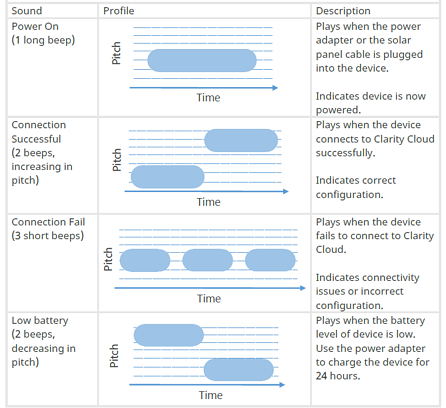
- Plug the device into an outlet with the provided power adapter. The device will play the Power On sound (single beep). Disregard any subsequent sounds for now.
- Charge for 24 hours. After fully charging or to store the device, please disconnect the external power adaptor or solar panel cable from the device body. Keeping the cable connected will keep the device on and continue consuming the battery.
Configure the Node on Dashboard
Configuration on Dashboard is a key step in deploying your Node-S. This process assigns a location to your Node, initiates a new Datasource for measurement streaming, and establishes secure communication with Clarity Cloud.
- Scan the QR code on the bottom of the Node or log in to the Clarity Dashboard and navigate to the Devices / Nodes page.
- Find the Node in the Inventory table and click on Configure.
- Follow the configuration steps:
- Step 1: Choose a name for the new Datasource that the Node will record measurements to. Tip: For field deployments, use names that refer to the location you are deploying at such as “Main Street”. For collocations use descriptive names such as “Collocation at Laney College for A20DDFG4”.

- Step 2:
- Enter the Node's location using latitude and longitude. You can manually input these, use a map, or use your device's location feature.
- Specify if the Node is indoor or outdoor, and provide the mounting height and distance from the nearest road if applicable.
- Indicate how you are powering the node: with the provided solar panel or power adapter, or with Clarity's External Power System, used in combination with certain add-on Modules. If using an External Power System, specify the Power Module ID, which is located on the system's battery pack.

- Step 1: Choose a name for the new Datasource that the Node will record measurements to. Tip: For field deployments, use names that refer to the location you are deploying at such as “Main Street”. For collocations use descriptive names such as “Collocation at Laney College for A20DDFG4”.
-
- Step 3: Add photos of the deployment site (optional).

- Step 3: Add photos of the deployment site (optional).
-
- Step 4: Review the information you entered and click Submit

- Step 4: Review the information you entered and click Submit
Here are links to more detailed guides on Node management and Datasource management on Dashboard.
Pre-deployment tests
- At the deployment site, plug the solar panel cable or mains-power connector into the device. The device will play the Power On sound and attempt to connect to Clarity Cloud.
- If the Connection Failure sound (beep beep beep) plays, please confirm the device has been configured on the Dashboard first. If this doesn't resolve the issue, please contact us support@clarity.io.
- If you hear a Low Battery sound, please charge the device for at least 24 hours before proceeding.
- If the Connection Successful sound plays, proceed to deploy the device.
-
After successful connection, please wait for the first data point to upload to the Cloud and to appear on the Dashboard, which may take anywhere from 2 to 20 minutes depending on cellular connectivity strength. This can be checked by looking at the 'Last Reading Received' column on the Nodes page.
Deploy the device
- Mount the device to a pole, wall, or panel using stainless steel zip ties, hose clamps, binding straps, or screws that are appropriate for your site (not provided). Ensure the inlet and outlet are facing downwards and unobstructed. Make sure there is at least 250 mm/10 in clearance below the device inlets.
Note: When deploying devices with the solar shield, mounting devices to a pole is recommended. Mounting to a wall or other flat surface may not be possible or require additional equipment.

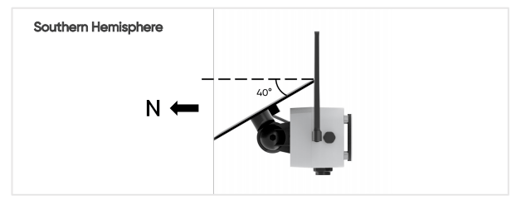
- Orient the solar panel south (northern hemisphere) or north (southern hemisphere) with the optimum angle. Please find the optimum angle for your site here.
Note: The optimum angle for the solar panel will vary during the winter and summer months if not near the equator. You may need to adjust the solar panel as the seasons and sun patterns change to maximize sunlight exposure in some locations. If accessing the device is difficult and the solar panel can't be adjusted, we recommend using the more conservative winter angle as long as during the summer months, there will be plenty of direct sun exposure.
Congratulations! The device is online and uploading data.
If you have Clarity modules to deploy, please continue deployment using the following guides below: